A shop vac hose usually keeps clogging because the material is too large, damp, stringy, or entering through a restrictive attachment. Check the hose, filter, seals, setup, and drum in that order before blaming the motor.
What do you need help with?
Open an answer, or tell us what we should cover next.
Answered in this guide
Clear a shop vac hose that keeps clogging
Unplug the shop vac, disconnect the hose, and remove the material blocking it. Clearing the hose is the first step before checking the attachment, filter, seals, drum, or motor.
Inspect the nozzle and other attachments for debris or narrow passages that restrict airflow. A blocked attachment can cause material to collect in the hose even when the hose itself is clear.
Requests help us prioritize the next guide. No email required.
One anonymous request per topic.
If your shop vac hose keeps clogging, stop the vacuum, unplug it, and clear the blockage before continuing. The most common causes are an unsuitable attachment, a partially blocked hose, a dirty or incorrect filter, damp debris, or material that is too large for the hose diameter. Work through the checks below in order.
1. Unplug the vacuum and clear the hose
Disconnect the shop vac from power before inspecting it. Remove the hose from the inlet and accessory, then look through it from both ends.
For a light blockage:
Shake or flex the hose to loosen the material.
Use a broom handle or another blunt, smooth object to push the clog out carefully.
Do not use a sharp rod that could puncture the hose.
Do not put your hand deep into a hose if the blockage contains glass, nails, screws, or other sharp debris.
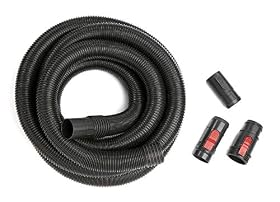
If the hose is kinked, crushed, or soft enough to collapse under suction, it may restrict airflow and collect debris at the same point. A damaged hose is usually better replaced than repaired with tape.
2. Check the material being collected
Some debris is much more likely to clog a shop vac hose than ordinary dry dust. Common problem materials include:
Long strips of plastic, paper, or packaging
Cloth, string, wire, and flexible packing material
Wet leaves and clumps of dirt
Sawdust mixed with larger wood chips
Hair, insulation, and fibrous debris
Large chunks that barely fit through the hose opening
Break large pieces into smaller sections when appropriate, or remove them by hand rather than vacuuming them. For stringy debris, a wider hose or a different cleanup method may be more suitable. Never vacuum material that the vacuum manufacturer prohibits, including flammable liquids or hazardous dust unless the equipment is specifically rated and configured for it.
Product prices and availability are accurate as of the date/time indicated and are subject to change. Any price and availability information displayed on Amazon.com at the time of purchase will apply to the purchase of this product.
3. Inspect the nozzle and attachments
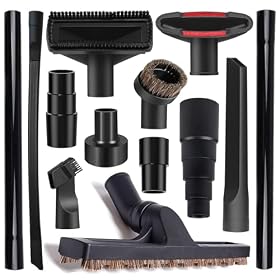
A clog may be in the floor nozzle, crevice tool, wand, elbow, or hose adapter rather than in the hose itself. Remove each accessory and check its narrowest opening.
A tool with a small inlet can clog even when the main hose is clear. Try the vacuum briefly with the hose connected but the accessory removed. If suction returns, clean or replace the blocked attachment.
Avoid pushing large debris through a narrow crevice tool. Use the widest suitable nozzle for chips, leaves, and other bulky material.
Product prices and availability are accurate as of the date/time indicated and are subject to change. Any price and availability information displayed on Amazon.com at the time of purchase will apply to the purchase of this product.
4. Check the filter and filter installation
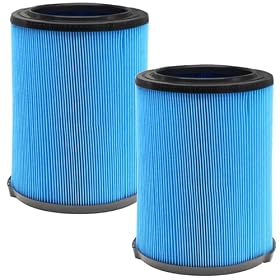
A loaded filter reduces airflow. Reduced airflow can make debris move slowly, allowing it to settle inside the hose and form a clog.
Turn off and unplug the vacuum, then inspect the filter according to the owner's manual. Depending on the filter type, you may need to:
Tap or brush off loose dust outdoors.
Wash it only if the manufacturer says it is washable.
Let a washable filter dry completely before reinstalling it.
Replace a torn, collapsed, saturated, or excessively loaded filter.
Install the filter intended for the material and wet-or-dry mode being used.
Do not run a wet-dry vacuum in wet mode with a dry-use paper filter installed unless the manufacturer specifically permits it. Do not operate the vacuum without the required filter or float components.
Fine dust can clog a filter quickly, especially drywall dust, ash, concrete dust, and fine sawdust. Use the correct filtration system for the dust rather than repeatedly trying to clear the hose.
Product prices and availability are accurate as of the date/time indicated and are subject to change. Any price and availability information displayed on Amazon.com at the time of purchase will apply to the purchase of this product.
5. Look for leaks at the hose and fittings
An air leak can reduce the velocity inside the hose. Check both ends of the hose, the inlet connection, extension wands, and the accessory adapter.
Look for:
A hose end that no longer locks securely
Split plastic or rubber around a coupling
A missing gasket or loose seal
An adapter that does not match the hose or tool
Cracks in the inlet or accessory fitting
A loose connection may allow air to enter around the hose while debris remains stuck inside. Replace damaged couplers, gaskets, or adapters with parts that match the vacuum and hose connection. Avoid relying on tape where a sealed, secure connection is required.
6. Confirm the vacuum is set up for the job
Some shop vacs have separate connections or settings for collection and exhaust. Confirm that the hose is attached to the correct inlet for vacuuming and that any blower or exhaust port is closed as directed by the manual.
Also check that:
The hose is as straight as practical.
The hose is not sharply bent behind furniture or equipment.
The vacuum is configured for wet or dry pickup correctly.
Any pre-separator or cyclone is empty and connected properly.
A pre-separator can reduce filter loading, but its inlet and outlet can also clog. Empty and inspect it whenever airflow drops.
7. Empty the drum or replace the bag
A full drum or collection bag can restrict airflow and make the hose clog more often. Empty the drum before debris reaches the inlet or the maximum fill mark.
If your vacuum uses a disposable collection bag, verify that it is the correct type and installed without blocking the inlet. A torn bag can release dust into the filter and motor area; a poorly fitted bag can collapse over the inlet.
After emptying the drum, check the internal inlet screen or baffle for packed debris. Keep hands clear of sharp material and wear appropriate eye and respiratory protection when handling dusty contents.
8. Consider hose diameter and length
A narrow hose has less room for bulky debris and is more likely to clog than a wider hose. Long hoses, multiple extensions, and several tight bends also reduce airflow.
When choosing a replacement, match these specifications:
Inside diameter: It must accept the debris and fit the vacuum's inlet or adapter.
Length: Longer is not always better; excessive length can reduce airflow.
Connection type: Threaded, friction-fit, locking, and proprietary connections may not interchange.
Flexibility and crush resistance: A hose that collapses under suction can behave like a partial clog.
Intended use: A hose designed for general debris may not be appropriate for fine dust collection or wet pickup.
Do not assume that a hose with the same advertised diameter will connect directly. Measure the actual connection or check the manufacturer's compatibility information before buying.
9. Check for a motor or electrical problem last
If the hose, attachment, filter, seals, setup, and drum are all clear but suction remains weak, inspect the vacuum for signs of a larger problem. Unusual motor noise, burning odor, overheating, repeated breaker trips, or a motor that will not start are reasons to stop using it.
Unplug the vacuum and follow the owner's manual for permitted maintenance. Do not bypass thermal protection, open sealed electrical components, or continue operating a motor that is overheating. A qualified service professional should handle electrical diagnosis when the cause is not obvious.
If the vacuum has normal motor sound but poor airflow after all basic checks, a damaged impeller, blocked internal passage, or worn motor assembly may be involved. For an older or heavily used unit, replacing the vacuum can be more practical than paying for a major repair—especially if replacement hoses and filters are also difficult to source.
How to prevent recurring hose clogs
Clear large pieces by hand before vacuuming.
Use the widest suitable attachment for bulky debris.
Keep the hose straight and avoid tight bends.
Empty the drum or bag before it is completely full.
Clean or replace filters at the interval specified in the manual.
Use a pre-separator for large amounts of chips, dust, or dry debris when compatible.
Keep wet debris from mixing with dry dust unless the vacuum is configured for wet pickup.
Inspect the hose after every major cleanup for crushed sections or internal buildup.
Stop immediately when airflow drops instead of continuing to pack debris into the hose.
If the hose repeatedly clogs with ordinary debris after the filter, attachments, fittings, and drum have been checked, the hose may be undersized, internally damaged, or incompatible with the vacuum. Replacing it with a correctly matched, larger-diameter hose is the reasonable next step. If a new compatible hose does not restore airflow, the vacuum itself may need service or replacement.
FAQ
Why does my shop vac hose clog with sawdust?
Sawdust can pack together when the filter is dirty, the hose is too narrow, or larger wood chips mix with fine dust. Clear the hose and attachment, clean or replace the correct filter, empty the drum, and consider a compatible pre-separator for larger volumes.
Can I use a larger hose on my shop vac?
Sometimes, but the hose must match the vacuum inlet, fittings, and intended airflow. A larger hose can reduce clogging with bulky debris, but an incompatible adapter or excessively long hose may reduce performance. Check the vacuum manufacturer's compatibility guidance.
Why does my shop vac clog only when I use the crevice tool?
The crevice tool has a narrow opening that can trap debris easily. Remove it and test the hose with a wider attachment. Clean or replace the crevice tool if suction returns with the tool removed.
Should I replace the shop vac hose or the vacuum?
Replace the hose when it is crushed, split, undersized, or repeatedly clogs despite proper cleaning and setup. Consider replacing or professionally servicing the vacuum when airflow remains poor with a clear, compatible hose and clean filter, or when the motor overheats, smells burnt, or trips a breaker.