Drywall dust can quickly block a shop vac filter and reduce suction. Follow these checks in order to clear the clog safely and determine whether you need a replacement filter, hose, or vacuum.
Shop vac clogged with drywall dust
A shop vac clogged with drywall dust usually has a loaded filter, blocked hose, or leaking connection. Fine joint-compound dust can pack into filter pleats quickly, so unplug the vacuum, move it outdoors if possible, and check the filter before running it again.
1. Stop the vacuum and protect yourself
Turn the shop vac off and unplug it before opening the drum or removing a hose. Drywall dust is very fine and can become airborne easily. Wear eye protection and a properly fitted dust mask or respirator suitable for fine dust. Avoid shaking the filter indoors or blowing it out with compressed air near people, cars, or open windows.
Check the vacuum’s manual before cleaning the filter. Some filters can be brushed, tapped out, or washed; others must stay dry. Never reinstall a washable filter until it is completely dry.
2. Inspect and clean the filter
The filter is the most likely restriction. Remove it according to the manufacturer’s instructions and look for:
Drywall dust packed into the pleats
A solid coating over the filter surface
Torn paper, separated seams, or a damaged end cap
A filter that is wet when it should be used for dry pickup
Clean the filter only by the method approved for that filter. A washable cartridge filter may be rinsed, while a dry-only filter may need gentle tapping or brushing. Do not use a damaged filter, since dust can pass into the motor and exhaust area.
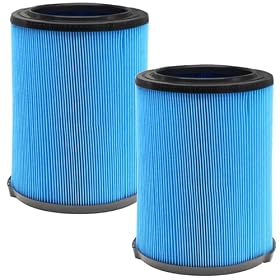
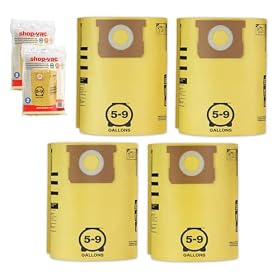
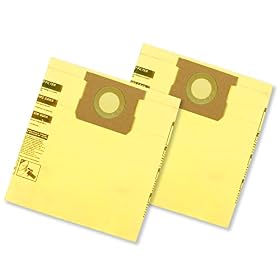
For repeated drywall work, a compatible fine-dust or HEPA-rated filter may help capture smaller particles, but “HEPA” does not guarantee compatibility with every shop vac. Confirm the filter’s fit and approval for your vacuum. A disposable collection bag, if supported by the vacuum, can also keep more dust out of the pleated filter.
Product prices and availability are accurate as of the date/time indicated and are subject to change. Any price and availability information displayed on Amazon.com at the time of purchase will apply to the purchase of this product.
3. Check the hose and wand for a blockage
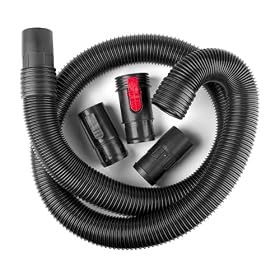
With the vacuum unplugged, disconnect the hose and inspect both ends. Shine a light through it or gently pass a flexible object through the hose without puncturing it. Do not use a sharp rod that could damage the hose.
Look for a plug of compacted joint compound, a flattened section, or drywall dust packed around an attachment. Check the wand, floor nozzle, and hose adapter as well. A blockage near the hose inlet can make the vacuum sound normal while greatly reducing airflow.
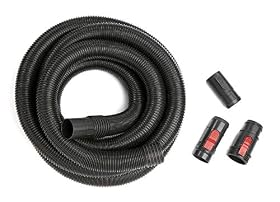
If the hose is cracked, crushed, or too soft to hold its shape, replacement is usually more practical than trying to seal it permanently. Use a hose with the correct diameter and connection style for your vacuum.
Product prices and availability are accurate as of the date/time indicated and are subject to change. Any price and availability information displayed on Amazon.com at the time of purchase will apply to the purchase of this product.
4. Look for air leaks at seals and connections
A shop vac needs a sealed path from the nozzle to the filter and drum. Check the following areas:
Hose-to-inlet connection
Hose-to-tool connection
Drum lid gasket
Filter mounting area
Collection bag collar, if fitted
Cracks in the drum or lid
A loose lid, displaced gasket, or poorly seated filter can reduce suction and allow drywall dust to escape. Reseat each connection and replace a visibly torn gasket or seal with a compatible part. Do not rely on tape around a damaged drum or lid if the repair prevents the lid from sealing correctly.
Product prices and availability are accurate as of the date/time indicated and are subject to change. Any price and availability information displayed on Amazon.com at the time of purchase will apply to the purchase of this product.
5. Confirm the setup is correct
Make sure the vacuum is configured for dry pickup. Remove any water-pickup component that the manufacturer says should not be used for dry dust, and install the required dry filter. If the vacuum uses a collection bag, verify that the bag is installed in the correct position and that its collar is not blocking the inlet.
Some vacuums have a filter-cleaning feature or a dust-separator connection. Use those features only as described in the manual. A cyclone separator or drywall dust extractor can reduce the amount of fine dust reaching the shop vac, but it will not fix a blocked filter or leaking hose.
6. Empty a full drum or replace a full bag
A full drum can restrict airflow, especially when the collected material reaches the filter area. If a collection bag is installed, replace it when it is full or airflow drops. Do not continue operating with a bag that is torn or detached from the inlet.
Empty drywall dust carefully. Seal the waste in a bag rather than sweeping it into the air. Follow local disposal requirements and any product safety instructions for joint compound or construction dust.
7. Check the motor only after the airflow path is clear
After cleaning or replacing the filter, clearing the hose, sealing the drum, and emptying the vacuum, run it briefly in a clear, ventilated area. If suction returns, the problem was likely an airflow restriction or setup issue.
If the motor still sounds strained, shuts off, smells hot, sparks, or produces weak airflow with the hose removed, stop using it. Unusual electrical noise, a burning odor, repeated thermal shutdowns, or visible damage requires service by a qualified technician or replacement of the vacuum. Do not bypass a thermal protector or open the motor housing unless the manufacturer specifically provides a safe service procedure.
When to replace the filter or the shop vac
Replace the filter when it remains restricted after approved cleaning, has visible damage, or no longer seats securely. Choose a replacement based on the exact vacuum model and the type of dust being collected. A filter designed for ordinary debris may not be suitable for fine drywall dust.
Replace the hose when it is crushed, split, or incompatible with the vacuum’s inlet and attachments. Replacing the entire shop vac is reasonable when the drum, lid, motor, or electrical components are damaged, or when the unit cannot maintain airflow after the filter and hose are known to be clear.
For substantial drywall sanding, consider using dust collection at the tool, a compatible fine-dust filter or bag, and adequate ventilation. Follow the vacuum, filter, tool, and joint-compound manufacturers’ instructions, and use professional dust-control equipment when the work creates a large amount of airborne dust.
FAQ
Can drywall dust ruin a shop vac filter?
Yes. Fine drywall dust can quickly load the filter, restrict airflow, and potentially pass into the motor if the filter is damaged or incorrectly installed. Clean or replace the filter using the manufacturer’s approved method.
Should I use a shop vac without a filter for drywall dust?
No. Operating without the required filter can allow dust to reach the motor and exhaust into the room. Use the filter specified for dry fine dust and confirm whether a collection bag is required or recommended.
Can I wash a shop vac filter clogged with drywall dust?
Only if the filter is labeled washable or the manufacturer’s instructions allow it. Dry-only filters can be damaged by water and must be cleaned or replaced according to their instructions.
Why does my shop vac still have weak suction after cleaning the filter?
Check the hose, wand, nozzle, drum, bag, lid gasket, filter seal, and other connections for blockages or leaks. If airflow remains weak with the hose removed and the path clear, stop using the vacuum and arrange qualified service or replacement.