Dust coming from a shop vac’s exhaust usually points to a missing, damaged, clogged, or incorrectly installed filter. Follow these checks to identify the cause and decide whether a replacement filter or vacuum is needed.
Shop vac blowing dust out the exhaust
If your shop vac is blowing dust out the exhaust, stop using it for dry debris until you check the filtration system. The most common causes are a missing or damaged filter, the wrong filter for the material being collected, an improperly fitted filter, or a full collection bag or drum. Unplug the vacuum before inspecting it, and follow the filter and attachment instructions for your specific model.
1. Check the filter first
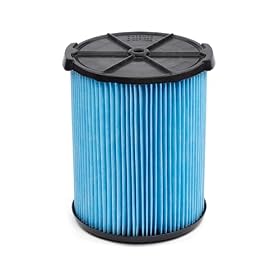
A shop vac needs the correct filter installed for dry pickup. If the filter is missing, torn, loose, badly clogged, or not seated against its sealing surface, dust can pass through the motor housing and exit through the exhaust.
Unplug the vacuum, remove the motor head, and inspect the filter for:
Holes, splits, or crushed pleats
A loose retaining strap, nut, cage, or latch
Dust bypassing the edge of the filter
A filter that is wet when you are trying to collect dry debris
A filter that does not match the vacuum’s required type or size
Do not rely on a visibly clean filter if its rubber gasket or mounting surface is damaged. Fine dust can escape through a small gap around the edge.
Replace a disposable or damaged filter rather than trying to repair it with tape. Use the filter type specified by the manufacturer. A standard cartridge filter may not capture all very fine dust, such as drywall compound, masonry dust, fireplace ash, or concrete dust.
Clean the filter correctly
A washable filter should only be washed if the manufacturer permits it. Let it dry completely before reinstalling it. A damp filter can restrict airflow and may be damaged by continued use.
For a dry-only filter, follow the cleaning instructions rather than striking it against a hard surface or using excessive air pressure. Aggressive cleaning can create holes that are difficult to see.
2. Confirm the filter is installed for the job
Wet-dry vacuums often use different filter arrangements for wet and dry pickup. Some models require a cartridge filter for dry debris, while others use a foam sleeve for certain wet-pickup tasks. Some also support a collection bag inside the drum.
Check the manual before switching between wet and dry pickup. In particular:
Do not collect dry debris with the filter removed unless the manufacturer specifically allows that setup.
Do not use a foam wet-pickup sleeve as a substitute for a dry-debris filter.
Do not use a paper collection bag for liquid pickup.
Make sure the filter cage, retainer, and gasket are in their intended positions.
If the vacuum recently changed from wet pickup to dry pickup, the filter may have been left off or installed incorrectly.
Product prices and availability are accurate as of the date/time indicated and are subject to change. Any price and availability information displayed on Amazon.com at the time of purchase will apply to the purchase of this product.
3. Inspect the hose and inlet for a clog
A blocked hose or inlet can reduce airflow and cause dust to circulate inside the drum instead of reaching the filter efficiently. It can also make the motor sound unusually strained.
With the vacuum unplugged, disconnect the hose and look through it. Check both ends for packed debris, plastic, cloth, screws, or other objects. Inspect the tank inlet and any elbow or adapter for blockage.
If the hose is clear, briefly check whether the vacuum’s airflow is stronger directly at the inlet. Keep hands, clothing, and loose materials away from the opening, and do not run the vacuum without the required filter and components installed. A damaged or collapsed hose should be replaced because leaks and restrictions can interfere with dust collection.
Product prices and availability are accurate as of the date/time indicated and are subject to change. Any price and availability information displayed on Amazon.com at the time of purchase will apply to the purchase of this product.
4. Check for leaks around the filter and drum
Dust can escape from a poor seal even when the filter itself looks intact. Examine the filter gasket, motor-head seal, drum rim, hose connection, and any accessory adapter.
Look for:
A gasket that is twisted, hardened, cracked, or missing
A drum lid that is not fully latched
A filter retainer that is loose
Cracks in the drum or motor head
A hose cuff that does not fit tightly
An adapter that leaves a visible gap
Clean dust from the sealing surfaces and reinstall the parts squarely. Do not operate the vacuum if a cracked housing exposes electrical components. A replacement gasket, filter retainer, hose cuff, or lid seal may solve the problem when the motor and housing are otherwise in good condition.
Product prices and availability are accurate as of the date/time indicated and are subject to change. Any price and availability information displayed on Amazon.com at the time of purchase will apply to the purchase of this product.
5. Empty the drum or replace the collection bag
A full drum or bag can reduce airflow and allow dust to remain suspended inside the vacuum. Fine debris may then be pushed toward the exhaust.
Turn off and unplug the vacuum before emptying it. If it uses a disposable collection bag, replace the bag when it is full or noticeably restricted. Make sure the bag’s opening is fitted over the inlet as directed; a loose or torn bag can allow debris to bypass the filter.
Do not pack the drum beyond its intended capacity. A full container can also block the inlet and make the vacuum appear to have a filter problem.
Product prices and availability are accurate as of the date/time indicated and are subject to change. Any price and availability information displayed on Amazon.com at the time of purchase will apply to the purchase of this product.
6. Consider the type of dust
Not every shop vac filter is suitable for every material. Very fine particles can pass through a coarse filter or escape when the filter loads quickly. Dust from drywall, cement, wood sanding, ash, and similar materials may require a fine-dust filter, a compatible collection bag, or a separate dust-extraction system.
Ash is a special concern because hot embers can remain hidden. Only collect ash if the vacuum is specifically designed and approved for that use, and follow the manufacturer’s safety instructions. Never vacuum hot material.
For hazardous, toxic, or silica-containing dust, use equipment rated for the material and follow applicable workplace and health guidance. A general-purpose shop vac may not provide adequate containment.
7. Check the motor and electrical system last
If the correct filter is installed and sealed, the hose is clear, and the drum or bag is not full, the problem may involve the motor head or internal airflow path. Possible signs include:
Dust appearing even with a new, correctly installed filter
A burning smell or visible smoke
Unusual grinding, rattling, or high-pitched noise
A motor that repeatedly shuts off
Weak suction despite an unobstructed hose and clean filter
Damage to the motor-head housing or exhaust area
Unplug the vacuum and do not open the motor housing unless the manufacturer’s instructions specifically permit user service. Electrical repairs and internal motor work should be handled by a qualified repair professional. Stop using the unit immediately if it sparks, overheats, or damages the power cord.
When to replace the filter or the vacuum
A replacement filter is usually the reasonable next step when the filter is torn, permanently clogged, missing, or no longer seals against the housing. Buy by the vacuum’s exact model or filter dimensions and mounting style; filters that look similar are not necessarily interchangeable.
Consider replacing the vacuum when the drum or motor head is cracked, replacement parts are unavailable, the motor has electrical or bearing damage, or repair costs approach the cost of a suitable replacement unit. If the vacuum works normally after a correctly fitted filter and a fresh bag, replacing the entire machine is usually unnecessary.
Quick diagnostic checklist
Unplug the shop vac.
Install the correct dry-pickup filter.
Inspect the filter media, gasket, retainer, and mounting surface.
Clear the hose, inlet, and adapters.
Check the drum, lid, bag, and all seals for leaks.
Empty the drum or replace a full collection bag.
Match the filter and collection setup to the material being collected.
Stop using the vacuum if it sparks, overheats, smells burnt, or has housing damage.
If dust still exits the exhaust after these checks, discontinue use and consult the manufacturer or a qualified repair professional.
FAQ
Can I use a shop vac without a filter?
For dry debris, generally no. A filter is needed to keep dust from passing through the motor and out the exhaust unless the manufacturer specifically approves another filtration arrangement. Always follow the model’s instructions.
Why is my shop vac blowing dust after I installed a new filter?
The new filter may be the wrong type, installed backward or incompletely, missing a retaining part, or failing to seal at the gasket. Also check for a full bag or drum, a clogged hose, and leaks around the lid or filter housing.
Should I wash a shop vac filter?
Only wash it if the manufacturer identifies it as washable. Let it dry fully before reinstalling it. Disposable filters should be replaced rather than washed.
What filter is best for fine dust?
Use a filter and collection bag rated for the type of fine dust you are collecting and approved for your vacuum. For hazardous or silica-containing dust, use equipment designed and rated for that material rather than relying on a general-purpose shop vac.