A shop vac that overflows during wet pickup usually has a missing, stuck, or ineffective float shutoff—or is being used with the wrong filter, bag, or setup. Follow these checks in order before replacing the vacuum.
A shop vac overflowing during wet pickup usually means the automatic float shutoff is not stopping airflow when the tank reaches its limit. A clogged or incorrectly installed float, the wrong filter or collection bag, a damaged seal, or an overfilled drum can also cause liquid to escape. Unplug the vacuum before opening it, and follow the manufacturer’s wet-pickup instructions for your specific model.
Stop the overflow safely
Turn off and unplug the shop vac. Do not reach into a tank or remove the motor head while the unit is connected to power.
Move the vacuum away from standing water if the power cord, switch, or motor housing may be wet.
Empty the drum outdoors or over a suitable drain if the liquid is safe to dispose of there. Treat dirty, chemical, oily, or contaminated liquid according to its disposal requirements.
Let the motor head and electrical connections dry completely before using the vacuum again.
If water has entered the motor housing, stop using the vacuum and have it inspected or replaced. Do not rely on drying alone if there is visible electrical damage, a burning smell, or repeated tripping of a breaker or GFCI outlet.
Check the float shutoff first
Wet/dry shop vacuums commonly use a float or float cage under the motor head. As the tank fills, the float rises and blocks the intake to prevent liquid from reaching the motor. You may hear a change in airflow or a higher-pitched motor sound shortly before shutoff.
With the vacuum unplugged and the motor head removed:
Confirm the float is present and can move freely up and down.
Look for debris, dried residue, or a damaged cage that prevents movement.
Check that the float is installed in the orientation specified by the manual.
Make sure the motor head is seated squarely on the drum.
Do not add homemade barriers, weights, or objects intended to force the float down.
Some models use a different shutoff design, so do not assume every float is removable or shaped the same way. If the float is cracked, missing, swollen, or does not move freely, replace the correct float or shutoff assembly if the manufacturer supplies one. If the part is unavailable, replacing the vacuum may be more practical than continuing to use it for wet pickup.
Product prices and availability are accurate as of the date/time indicated and are subject to change. Any price and availability information displayed on Amazon.com at the time of purchase will apply to the purchase of this product.
Inspect the filter and collection bag
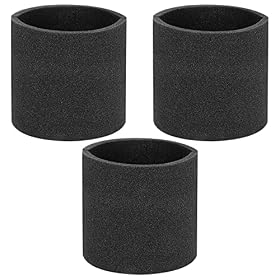
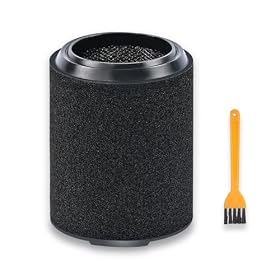
A wet pickup setup is not always the same as a dry pickup setup. Many shop vacuums require the dry cartridge filter or disposable paper bag to be removed before collecting liquid, while some models require a foam wet filter or another specified accessory. Using the wrong combination can restrict airflow, damage the filter, or interfere with the float shutoff.
Check the owner’s manual for:
Whether the cartridge filter must be removed for liquid.
Whether a collection bag is prohibited during wet pickup.
Whether the filter is installed over the float cage or another internal component.
Do not use a wet, collapsed, torn, or heavily clogged dry filter. Also avoid running a filterless vacuum in conditions where the manufacturer requires filtration. The correct setup depends on the vacuum’s design.
Product prices and availability are accurate as of the date/time indicated and are subject to change. Any price and availability information displayed on Amazon.com at the time of purchase will apply to the purchase of this product.
Look for a hose or nozzle blockage
A blockage can reduce airflow and make the vacuum behave unpredictably. It can also leave liquid in the hose that spills back into the drum or out through a connection.
Disconnect the hose and inspect both ends. Check for:
Mud, hair, leaves, sawdust, or debris packed inside the hose.
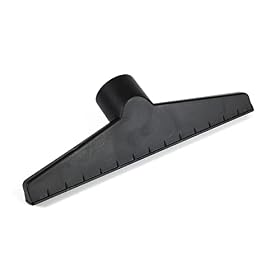
A clogged floor nozzle or crevice tool.
A hose kink or crushed section.
An adapter that does not fit the inlet correctly.
With the vacuum unplugged, clear the hose using a suitable method described by the manufacturer. Do not push a sharp object through the hose, since it can puncture the hose or damage a blockage that then reaches the vacuum.
Product prices and availability are accurate as of the date/time indicated and are subject to change. Any price and availability information displayed on Amazon.com at the time of purchase will apply to the purchase of this product.
Check the lid seal and drum connections
Liquid can escape even when the tank is not technically overfilled if the motor head is not sealed to the drum. Inspect the lid gasket, latches, drain plug, and hose inlet for damage or incorrect seating.
Look for:
A gasket that is twisted, hardened, torn, or missing.
Latches that do not close evenly.
A drain cap or plug that is loose or damaged.
Cracks in the drum or around the hose inlet.
Liquid trails originating at a seam rather than the top opening.
Clean the sealing surfaces and reinstall the head evenly. Replace damaged seals or plugs with parts made for that vacuum. Do not seal a cracked drum with a temporary adhesive and continue collecting water near electrical equipment.
Confirm the drum is not full or the vacuum is tilted
A float shutoff is a warning and protection system, not permission to continue filling the tank. Stop the vacuum as soon as airflow changes or the float engages, then empty the drum. Capacity can be reduced by debris, a wet filter, or liquid already trapped in the hose.
Keep the vacuum upright while operating it. A sharp tilt, pulling the unit over a step, or turning it while the tank is nearly full can allow liquid to bypass the normal shutoff path. If the model has a drain, use it only as directed and keep the vacuum disconnected while opening it.
When the motor or electrical system may be involved
If the float moves freely, the setup is correct, the hose is clear, and the seals are intact, the shutoff assembly or motor head may be defective. Stop using the vacuum if it continues running while the tank is full, spits liquid from the exhaust, makes an unusual grinding sound, smells hot, or trips a breaker or GFCI.
A replacement float, gasket, drain plug, hose, or wet-pickup filter is reasonable when the damaged part is clearly identified and available for the exact vacuum. Replace the entire unit when the drum or motor head is cracked, the correct shutoff parts are unavailable, or liquid has entered the motor housing. For electrical faults, use the manufacturer’s service process or consult a qualified repair professional rather than opening the motor head yourself.
FAQ
Why does my shop vac keep running when the tank is full?
The float shutoff may be stuck, missing, incorrectly installed, or blocked by debris. The vacuum may also be set up with a filter or bag that interferes with the shutoff. Unplug the unit, inspect the float, and verify the wet-pickup setup in the owner’s manual.
Should I remove the filter before vacuuming water with a shop vac?
It depends on the model. Some shop vacuums require the dry cartridge filter and paper bag to be removed, while others require a foam wet filter or a specified filter. Follow the manufacturer’s instructions rather than applying one setup to every vacuum.
Can a shop vac overflow if the hose is clogged?
Yes. A clogged hose or nozzle can restrict airflow, leave liquid trapped in the hose, and contribute to spills when the vacuum is moved or opened. Unplug the vacuum and inspect the hose, inlet, and attachment for blockages.
Is it safe to use a shop vac after water reaches the motor?
Do not use it until it has been inspected and confirmed safe. Unplug the vacuum, keep it away from standing water, and stop using it if there is a burning smell, visible damage, unusual noise, or repeated breaker or GFCI trips.