A shop vac usually leaks from the drum because of a loose drain plug, damaged seal, overfilled tank, poor lid fit, or an incorrect filter setup. Unplug it, identify whether the leak is liquid or air, and check these areas in order.
What do you need help with?
Open an answer, or tell us what we should cover next.
Answered in this guide
Diagnose why a shop vac is leaking from the drum
Unplug the vacuum, identify where liquid or air is escaping, and inspect the filter, hose path, lid seal, drain plug, drum level, assembly, and housing to find the cause.
Clean the lid and drum rim, then inspect the gasket, latches, sealing surfaces, and drum for damage or warping. Replace a worn gasket or related part if the lid cannot seal.
Prevent a shop vac from overflowing during wet pickup
Empty the drum before it becomes completely full. A float usually stops suction at the liquid limit, but continued filling can still send water toward the motor head, lid, or inlet.
Decide whether to replace a leaking shop vac part or the vacuum
Replace an available gasket, drain plug, filter, hose, or latch when the drum and lid are intact. Replace the vacuum when the drum or lid is badly damaged or the needed part is unavailable.
Requests help us prioritize the next guide. No email required.
One anonymous request per topic.
A shop vac leaking from the drum usually has a loose or damaged drain plug, worn lid seal, overfilled tank, or incorrectly installed filter. Unplug the vacuum before inspecting it, empty the drum, and determine whether you are dealing with a liquid leak, dust escaping around the lid, or air leaking from a seam. Then work through the checks below.
Safety first
If the vacuum contains water or another liquid, unplug it before moving or opening the unit. Keep the motor housing and electrical connections dry. Do not operate a wet-dry vacuum with a damaged power cord, cracked housing, or signs of water reaching the motor.
If the liquid may be flammable, corrosive, contaminated, or otherwise hazardous, stop and follow the manufacturer’s instructions rather than cleaning it with a standard shop vac.
1. Check the filter and filter installation
A filter normally does not cause water to leak through the drum wall, but an incorrect or damaged filter can allow dust, debris, or liquid to escape around the lid and appear to be a drum leak.
Confirm that the filter is the type specified for the material you are vacuuming.
Make sure the filter is fully seated and secured according to the manual.
Look for a torn, collapsed, heavily clogged, or distorted filter.
Check that the filter gasket or sealing edge is not folded or trapped.
Do not use a dry-only filter for wet pickup unless the manufacturer specifically allows it.
Remove a filter only when the vacuum’s instructions permit filterless wet pickup.
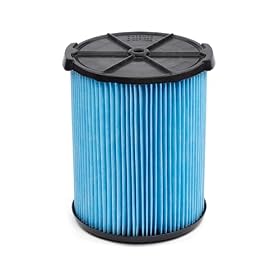
A replacement filter is reasonable when the filter media is torn, the frame is warped, or the sealing edge no longer contacts the housing evenly. Match the replacement to the exact vacuum model and the intended wet or dry application.
Replacement filter for damaged or incorrectly fitted filtration
Product prices and availability are accurate as of the date/time indicated and are subject to change. Any price and availability information displayed on Amazon.com at the time of purchase will apply to the purchase of this product.
2. Inspect the hose, inlet, and debris path
A blockage can cause unusual pressure and may force dust or liquid out through a weak seal. Disconnect the hose and check both ends, the hose opening, and the inlet inside the drum.
Look for:
A plug of sawdust, drywall dust, leaves, or wet debris
A hose that is kinked, crushed, or split
Debris packed around the drum inlet
An attachment that is blocked
A loose hose connection allowing air or liquid to escape
Clear the obstruction only after unplugging the vacuum. Do not push sharp objects through the hose, since puncturing it can create a permanent leak.
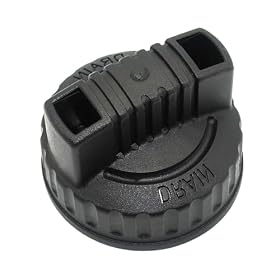
Replacement seal for a leaking drain or tank connection
Product prices and availability are accurate as of the date/time indicated and are subject to change. Any price and availability information displayed on Amazon.com at the time of purchase will apply to the purchase of this product.
3. Check the lid gasket and drum seal
If liquid is escaping where the lid meets the drum, the lid gasket or sealing surface is the most likely cause. Remove the lid and wipe both mating surfaces clean. Even a small layer of grit, wood chips, or dried material can prevent an even seal.
Inspect the gasket for:
Cracks, cuts, flattening, or missing sections
Hard or brittle rubber
A gasket pulled out of its groove
Areas that are twisted or pinched
Gaps where the gasket does not contact the drum
Reinstall the gasket as directed by the manufacturer. Close the lid evenly and engage every latch. Do not use household caulk, glue, or tape as a substitute for a replacement gasket; these materials can interfere with the lid and make future servicing difficult.
Also check the rim of the drum. A dent, crack, or warped section can prevent the lid from sealing even when the gasket is in good condition. A damaged drum or lid generally requires a model-specific replacement part or replacement vacuum.
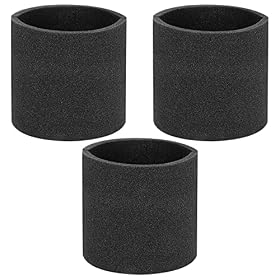
Replacement lid seal for leaks around the drum rim
Product prices and availability are accurate as of the date/time indicated and are subject to change. Any price and availability information displayed on Amazon.com at the time of purchase will apply to the purchase of this product.
4. Check the drain plug and drain seal
Many wet-dry vacuums have a drain port near the bottom or side of the drum. A loose, missing, cracked, or improperly seated drain plug can cause a steady leak that looks like a hole in the tank.
With the vacuum empty and unplugged:
Locate the drain plug or drain cap.
Tighten it by hand as specified in the manual; do not overtighten plastic parts.
Check the plug, O-ring, washer, or rubber seal for damage.
Remove debris from the drain opening and sealing surface.
Replace the plug or seal if it is cracked, flattened, or no longer fits securely.
Do not operate the vacuum with a temporary plug or improvised seal. A replacement drain plug or gasket is usually a simple repair when the drum itself is undamaged.
5. Confirm the vacuum is assembled and positioned correctly
A lid can appear closed while still being out of position. Make sure the lid is aligned with the drum and that each latch is fully engaged. Check that the filter cage, float assembly, and other internal parts are installed as the manual shows.
For wet pickup, place the vacuum on a level surface. A tilted drum can let liquid reach the lid or another opening before the float mechanism shuts off suction. Keep the vacuum upright while moving it, and avoid pulling it by the hose.
If the model has a detachable motor head, inspect the contact area between the head and drum. The head should sit evenly all around the rim, with no visible gap.
6. Empty a full drum before the float shuts off suction
A full drum can cause water to reach the motor head or escape through the lid and inlet. Most wet-dry vacuums use a float or similar shutoff mechanism to stop suction when the liquid level gets too high, but this does not replace regular emptying.
Turn off and unplug the vacuum when the drum is full or when the float has engaged. Empty it according to the instructions, then check whether the float moves freely and is not coated with debris.
Do not rely on the vacuum’s shutoff to handle an unattended spill. The correct liquid capacity varies by model, and some machines have different limits for wet pickup and dry debris.
7. Look for a cracked drum or damaged housing
After checking the removable seals and drain plug, inspect the drum closely. Small cracks can form around the drain opening, caster mounts, molded seams, or areas damaged by impact. A crack may leak only when the drum is filled or when the vacuum is tilted.
Clean and dry the outside of the drum, then look for a visible split, abrasion, or wet track. Do not assume a plastic repair compound will remain airtight or watertight under vacuum use. If the manufacturer does not offer an approved repair part, replacing the drum or the vacuum is safer and more reliable.
8. Consider a motor or electrical problem only after checking for leaks
The motor usually does not cause a physical drum leak. However, liquid that has reached the motor head can create an electrical hazard or damage the vacuum. Stop using the unit if you notice water near the motor, burning odor, unusual sparking, repeated breaker trips, or a motor that runs erratically.
Do not open the motor housing or bypass a float switch unless you are qualified to service the equipment. Follow the manufacturer’s service instructions or have the vacuum inspected by a qualified repair professional.
When to replace a part or the vacuum
A replacement gasket, drain plug, filter, hose, or latch is usually worthwhile when the drum and lid are intact and the exact part is available. Replace the vacuum instead when:
The drum or lid is cracked, badly warped, or no longer supported
The correct seal or housing part is unavailable
Liquid has reached the motor or electrical components
The vacuum has repeated leaks after proper seal replacement
Repair parts and labor approach the cost of a comparable replacement unit
Use the model number from the vacuum’s rating label when ordering parts. Similar-looking filters, gaskets, and drain plugs may not seal correctly across different models.
Quick diagnosis
Leak from the bottom or side drain: Check the drain plug, O-ring, and drain opening.
Leak around the lid: Clean the rim and inspect the lid gasket, latches, and drum for warping.
Dust escaping around the motor head: Check filter type, filter seating, and the lid seal.
Leak only when the vacuum is tilted: Keep it level and inspect the drum, drain, and lower seams.
Water near the motor: Stop using the vacuum and arrange qualified service or replacement.
After correcting the problem, run the vacuum only as directed by the manufacturer and monitor the repaired area during the first wet pickup. Never leave a leaking shop vac operating unattended.
FAQ
Why is my shop vac leaking water from the bottom?
The drain plug, drain O-ring, or drain opening is the most likely cause. Unplug and empty the vacuum, clean the sealing surfaces, and check for a loose, cracked, or flattened plug seal.
Can I use a shop vac with a cracked drum?
It is best not to. A crack can worsen under suction, allow liquid near electrical parts, and prevent the drum from sealing. Replace the drum with an approved part or replace the vacuum if the drum is not available.
Why is dust leaking around the shop vac lid?
Check that the filter is correct and fully seated, then clean the lid rim and inspect the gasket and latches. A torn filter, pinched gasket, warped lid, or damaged drum rim can all allow dust to escape.
Should I use caulk or tape to seal a leaking shop vac?
No. Improvised sealants can interfere with the lid, drain, float, or future repairs. Use a manufacturer-approved replacement gasket, drain plug, or drum part instead.