A shop vac usually loses suction because of a clogged filter, blocked hose, leaking seal, incorrect wet/dry setup, or an overfilled drum or bag. Check those causes in order before assuming the motor has failed.
Shop vac losing suction
If your shop vac is losing suction, start with the filter and hose before blaming the motor. A loaded filter, blockage, loose connection, damaged seal, incorrect filter setup, or full drum can reduce airflow significantly. Unplug the vacuum before inspecting it, and follow the manufacturer’s instructions for wet pickup, filter removal, and replacement parts.
1. Check the filter first
A clogged filter is one of the most common causes of weak suction. Fine dust can coat the filter and restrict airflow even when the drum is not full.
Unplug the shop vac.
Open the lid and inspect the filter.
Look for a thick layer of dust, caked debris, moisture, or damage.
Clean or replace the filter according to its instructions.
Make sure the filter is installed correctly before operating the vacuum.
Do not wash a filter unless the manufacturer identifies it as washable. A paper or cartridge filter can be damaged by water, while a wet filter can restrict airflow and allow other problems to develop.
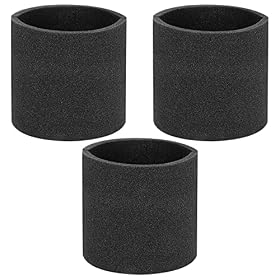
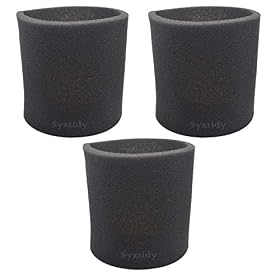
For wet pickup, use the filter and setup specified in the manual. Some vacuums require a foam wet filter, while others use a different arrangement. Do not assume that a dry dust filter is suitable for liquid pickup.
When to replace the filter
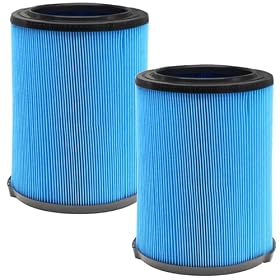
Replace the filter if it is torn, crushed, permanently caked with debris, visibly deteriorated, or still restricts airflow after approved cleaning. Use a filter that matches the vacuum’s model and intended application. A fine-dust filter may improve dust capture but can load faster during heavy debris collection if it is not cleaned regularly.
2. Inspect the hose and attachments
A partial blockage in the hose, wand, floor nozzle, or other attachment can make the vacuum appear to have a motor problem.
Disconnect the hose from the vacuum and inspect both ends.
Shine a light through the hose if possible.
Check for packed sawdust, hair, plastic, rags, or wet debris.
Inspect the hose for kinks, crushed sections, splits, or soft spots.
Check the nozzle and wand for obstructions.
Run the vacuum briefly with the hose removed only if the manufacturer permits this and the opening can be operated safely.
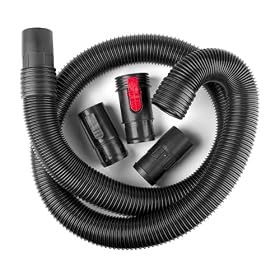
Never push a sharp object through the hose. It could puncture the hose or damage a hidden flap or fitting. Clear stubborn blockages from the direction they entered, or replace a hose that has collapsed or split.
Product prices and availability are accurate as of the date/time indicated and are subject to change. Any price and availability information displayed on Amazon.com at the time of purchase will apply to the purchase of this product.
3. Look for air leaks at seals and connections
A shop vac needs a reasonably airtight path from the nozzle to the drum and motor. A loose hose connection or damaged gasket can reduce suction at the attachment even if the motor is working normally.
Check the following points:
Hose-to-inlet connection
Hose-to-wand connection
Wand-to-nozzle connection
Lid-to-drum gasket
Filter cage and filter seal
Drain cap and drain gasket, if equipped
Collection bag or bag collar, if the vacuum uses one
Reconnect each part firmly. Replace cracked fittings, flattened gaskets, or torn collection bags. Do not rely on tape as a permanent repair around the motor housing, lid seal, or electrical components.
Product prices and availability are accurate as of the date/time indicated and are subject to change. Any price and availability information displayed on Amazon.com at the time of purchase will apply to the purchase of this product.
4. Confirm the wet/dry setup
Incorrect setup can cause poor pickup or activate the vacuum’s float shutoff. For example, a dry filter left in place during liquid pickup may become saturated, while a wet-pickup configuration may not be appropriate for dry dust.
Before switching modes:
Turn off and unplug the vacuum.
Empty the drum if necessary.
Install the filter or foam sleeve required by the manual.
Check that the float or liquid shutoff moves freely.
Reassemble the lid and clamps evenly.
If suction suddenly drops while collecting liquid, the float may have risen to protect the motor. Turn off the vacuum, empty the drum, and allow any wet filter or internal components to dry as directed. Do not bypass the float shutoff.
Product prices and availability are accurate as of the date/time indicated and are subject to change. Any price and availability information displayed on Amazon.com at the time of purchase will apply to the purchase of this product.
5. Empty the drum or replace the collection bag
A full drum or overloaded collection bag can block airflow. Some vacuums also lose suction when debris reaches the filter cage or when a disposable bag collapses against the inlet.
Empty the drum before debris reaches the maximum fill level. If a bag is installed, check that it is the correct type, properly seated, and not torn or packed solid. Make sure loose debris is not covering the drum inlet.
After emptying the vacuum, inspect the filter again. A full drum often sends extra dust into the filter, so resolving only the capacity problem may not restore normal airflow.
6. Check the inlet and internal passages
With the vacuum unplugged, inspect the inlet inside the drum. Remove visible debris only by hand or with a method approved by the manufacturer. Also check for a stuck float, displaced filter cage, or incorrectly seated internal component.
Do not reach into the motor housing or remove electrical covers for a routine suction problem. Internal repairs can expose you to electrical hazards and may require qualified service.
7. Consider the motor or electrical system last
If the filter is clean, the hose is clear, the seals are intact, the setup is correct, and the drum or bag is not full, the problem may involve the motor, switch, impeller, carbon brushes, or power supply.
Stop using the vacuum and arrange service if you notice:
Burning odor
Smoke or sparking
Unusual grinding or screeching
A motor that repeatedly shuts off
A hot plug, cord, or outlet
A circuit breaker that trips repeatedly
A motor that runs but produces very little airflow after all external checks
Do not continue operating a vacuum that has electrical symptoms. Have it inspected by a qualified professional or follow the manufacturer’s service process.
Quick troubleshooting order
Use this sequence to avoid replacing parts unnecessarily:
Unplug the vacuum.
Clean or replace the filter.
Clear the hose, wand, nozzle, and inlet.
Check the lid, hose, filter, drain, and bag seals.
Confirm the correct wet or dry configuration.
Empty the drum or replace an overloaded bag.
Test again using the correct attachment and power source.
Stop and seek service if the motor is noisy, hot, smoky, or electrically unstable.
When a replacement part or new shop vac makes sense
A replacement filter is usually the reasonable next step when the existing filter is damaged or cannot be cleaned effectively. Replace the hose if it leaks, collapses, or has a persistent blockage. Replace a gasket, bag, or attachment when it no longer seals or fits correctly.
A replacement shop vac may make more sense when the motor has failed, repair parts are unavailable, the drum or lid is cracked, or the repair cost approaches that of a suitable replacement. Match the replacement to the work: fine dust collection, wet pickup, large debris, and frequent use can require different filter and capacity arrangements.
When comparing a replacement, check the manufacturer’s airflow or suction specifications in the same measurement system rather than relying only on motor wattage or peak horsepower. Hose diameter, filter area, sealed connections, and the attachment can affect real-world pickup as much as motor size.
FAQ
Why does my shop vac lose suction when the filter gets dirty?
Dust coating the filter restricts airflow through the vacuum. Clean or replace the filter using the manufacturer’s approved method.
Can I run a shop vac without a filter to get more suction?
Only when the manufacturer specifically permits that setup for the material and operating mode. Otherwise, missing filtration can damage the motor and release dust.
Why does my shop vac lose suction when picking up water?
The float shutoff may have activated because the drum is full or liquid reached the shutoff mechanism. Turn it off, unplug it, empty the drum, and verify the wet-pickup setup.
Should I replace the hose or the filter first?
Inspect both, but check the filter first because it is a common airflow restriction. Replace the hose if it leaks, collapses, or has a blockage that cannot be cleared.