If your shop vac lid will not seal, inspect the drum rim, gasket, filter, float mechanism, and latches in that order. Most leaks are caused by dirt, misalignment, or a replaceable seal rather than a failed motor.
A shop vac lid that will not seal is usually being held up by debris, a misaligned filter or float, a damaged gasket, or a latch that is not engaging correctly. Unplug the vacuum, remove the lid, and work through the checks below before buying a replacement unit.
1. Empty and clean the drum rim
Unplug the shop vac before inspecting it. Remove the lid and empty the drum so you can see the entire sealing surface.
Clean these areas with a dry or slightly damp cloth:
The top rim of the collection drum
The underside channel of the lid
The lid gasket or sealing ring
Any grooves where sawdust, chips, plaster, or dried liquid may be stuck
Even a small amount of debris can create a gap. Check for a cracked or warped drum rim as you clean. A damaged rim may prevent a new gasket from sealing.
Do not force the lid down onto a large obstruction. That can bend the lid or damage the latches.
2. Check the filter and float assembly
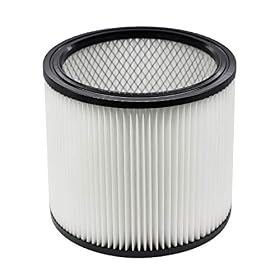
A filter or float cage that is installed incorrectly can press against the lid and keep it from sitting flat. Remove and reinstall the filter according to the vacuum manufacturer’s instructions.
Look for:
A filter that is not fully seated
A retaining band, cage, or cap installed in the wrong position
A float that is stuck in its raised position
A float cage that is loose, cracked, or obstructed
A filter that is too large or not intended for your vacuum
If the vacuum was recently converted from wet pickup to dry pickup, or the reverse, verify that the correct filter and accessories are installed. Never operate the vacuum without the filtration required by the manufacturer.
Product prices and availability are accurate as of the date/time indicated and are subject to change. Any price and availability information displayed on Amazon.com at the time of purchase will apply to the purchase of this product.
3. Inspect the lid gasket or seal
The gasket should sit evenly in its groove without twists, folds, gaps, or sections that stick above the rest of the seal. Over time, rubber or foam seals can become flattened, brittle, stretched, or torn.
A gasket is likely the problem if:
The lid sits flat on one side but not the other
Air leaks around one consistent section of the rim
The seal has a visible split or flattened area
The lid seals after you press down on it but opens a gap when released
The gasket has pulled out of its groove
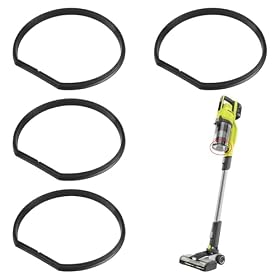
If the gasket is damaged or permanently deformed, replace it with a part specifically listed for the vacuum’s make and model. Do not rely on a generic strip unless its dimensions, material, and sealing design are appropriate. Avoid household caulk or adhesive as a permanent repair; it can interfere with lid removal and may not tolerate wet or dirty service.
Product prices and availability are accurate as of the date/time indicated and are subject to change. Any price and availability information displayed on Amazon.com at the time of purchase will apply to the purchase of this product.
4. Make sure the lid is aligned correctly
Set the lid straight down rather than sliding it sideways across the drum. Some shop vac lids have a specific orientation for the power head, float cage, hose inlet, or latches.
Check that:
The gasket remains inside its channel.
The lid is not rotated away from its normal position.
No cord, filter edge, hose connection, or accessory is trapped under the lid.
The lid rests evenly around the entire drum.
Each latch lines up with its corresponding catch.
If the lid only fits in one orientation, look for alignment tabs or molded marks. Do not assume a lid that appears to fit is properly seated.
Product prices and availability are accurate as of the date/time indicated and are subject to change. Any price and availability information displayed on Amazon.com at the time of purchase will apply to the purchase of this product.
5. Examine the latches and catches
With the lid positioned correctly, close each latch without excessive force. A latch that will not close may be bent, cracked, loose, or misaligned with the catch on the drum.
Compare the problem latch with the others. Check for:
A broken plastic hook
A stretched or loose latch pivot
A catch pulled away from the drum
Missing screws or fasteners
A latch that closes but does not pull the lid down firmly
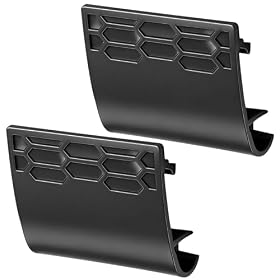
If a latch is broken, replace the latch or the affected lid or drum component if the manufacturer supplies it separately. Do not use straps, clamps, or improvised fasteners while the vacuum is operating unless the manufacturer specifically permits that repair. The lid must remain secure, particularly during wet pickup or when the vacuum could tip.
6. Check for a full drum, bag, or blockage
A full collection drum or overfilled dust bag can push material into the lid area. Remove the contents and inspect the inside of the drum, including the area around the inlet and float assembly.
Also check the hose and accessories for a blockage. A clog does not normally prevent the lid from physically closing, but it can increase airflow problems and make a poor seal more noticeable during operation.
Use the correct bag, if your vacuum requires one. An incorrectly fitted bag can bunch under the lid or block the seal.
7. Look for a warped or damaged lid
Place the removed lid on a clean, flat surface and inspect it for rocking, cracks, or a visibly bowed shape. Heat, impact, overtightened hardware, or storage pressure can deform plastic components.
A slightly flexible lid may still seal when correctly installed, but a lid that remains visibly warped or cracked is generally a replacement-part issue. Replacing only the gasket will not solve a lid that cannot press evenly around the drum.
If the lid seals but the vacuum still leaks
A lid can appear closed while air or liquid leaks because the gasket is not compressed evenly. With the vacuum unplugged, check for gaps around the perimeter and confirm that all latches have engaged.
For a suction leak, also inspect:
The hose connection at the drum or lid
Accessory connections
Drain cap and drain seal, if equipped
Cracks in the drum or lid
The filter’s mounting area
For wet pickup, stop using the vacuum immediately if liquid escapes from the lid, motor-head area, cord, or switch. Unplug it and follow the manufacturer’s wet-use and cleanup instructions. Do not operate a wet/dry vacuum with water inside electrical components.
When to replace a part or the vacuum
A replacement gasket is the reasonable next step when the drum and lid are sound but the seal is torn, flattened, or missing. Replace a latch when it no longer pulls the lid down or its plastic is damaged.
Replace the lid or drum when it is cracked, warped, or no longer aligns after the gasket and latches are correctly installed. Replacing the entire shop vac makes more sense when compatible sealing parts are unavailable, several structural parts are damaged, or the motor head has also developed electrical or performance problems.
If the vacuum trips a breaker, smells hot, shows cord or switch damage, or has liquid contamination near electrical parts, stop troubleshooting internally and have it assessed by a qualified repair professional or replace it according to the manufacturer’s guidance.
FAQ
Can I use a shop vac if the lid does not seal completely?
It is best not to. A poor seal can reduce suction and allow dust or liquid to escape. If the lid will not latch securely, unplug the vacuum and correct the gasket, alignment, latch, or lid problem first.
Why does my shop vac lid pop open when I turn it on?
Common causes include a gasket that is out of position, a full drum or bag, a filter or float assembly pressing against the lid, or damaged latches. Clean the rim, reseat the filter, empty the drum, and inspect the latches before operating the vacuum again.
Can I replace the gasket on a shop vac lid?
Often, yes, if the manufacturer offers a compatible replacement seal. Match the part to the vacuum’s exact make and model, and install it in the original groove without twisting it.
Why will one side of my shop vac lid not close?
The lid may be rotated or misaligned, the gasket may be folded or obstructed, or one latch or catch may be damaged. Remove the lid, clean the rim, check the gasket channel, and realign the lid before closing the latches.