
A shop vac is usually worth repairing when the problem is a clogged filter, blocked hose, damaged seal, faulty switch, or another affordable replacement part. Replacement makes more sense when the motor has failed, the tank is cracked, several major parts are worn, or the repair approaches the cost of a comparable new vacuum.
Price & Buying · Mon Sep 07
When to repair a shop vac versus replace it
A clogged filter, damaged hose, or worn seal can make a shop vac seem dead when the repair is simple. Use this guide to decide whether to fix the problem or replace the vacuum.
Start with the repair cost
Before buying parts, compare the likely repair cost with the cost of a new shop vac that meets your needs. Include:
- The replacement part
- Shipping and availability
- Any labor cost
- The age and condition of the vacuum
- Whether the repair restores the original performance
A simple filter or hose replacement is often reasonable even on an older unit. A motor, control board, or damaged tank can be difficult to justify unless the vacuum is relatively new, unusually powerful, or has a feature you need.
As a practical rule, repair is more attractive when the problem is isolated and the rest of the vacuum is in good condition. Replacement is more attractive when multiple components are failing or the machine has a safety-related defect.
Replacement filtration
 2-Pack VF3500 Replacement Filter for Ridgid 3-4.5 Gal Wet/Dry Shop VacsZILAMGOO
$18.99 as of
View on Amazon JAMHER 6Pack Reusable Wet/Dry Filter VF2002 90107 For Most Vacuum CleanerJAMHER
$7.99 as of
View on Amazon Replacement Filter For Shop Vac 90304 90585 Vacuum 5 Gallon and aboveYH Maialan
$18.99 as of
View on Amazon
Product prices and availability are accurate as of the date/time indicated and are subject to change. Any price and availability information displayed on Amazon.com at the time of purchase will apply to the purchase of this product.
Problems that are usually worth repairing
Clogged or damaged filter
A dirty filter can reduce suction, cause the motor to sound strained, and make the vacuum appear to be failing. The correct cleaning method depends on the filter type. Some filters can be tapped clean or washed; others should only be replaced. Follow the filter and vacuum manufacturer's instructions.
Replace the filter if it is torn, collapsed, permanently clogged, or no longer seals against the filter cage. A damaged filter can allow dust into the motor and may make the vacuum unsafe or ineffective for the intended material.
If you regularly collect fine dust, check whether your current filter is designed for that application. A standard filter may not be suitable for fine construction dust or other hazardous materials.
Blocked, cracked, or collapsed hose
A hose problem is one of the simplest repairs. Disconnect the hose and inspect it for:
- A plug near the inlet or elbow
- A crushed section
- A split at either end
- A loose cuff or adapter
- A blockage in the wand or floor nozzle
With the vacuum unplugged, remove visible debris without forcing sharp objects through the hose. If the hose leaks, collapses, or has a damaged connector, replacement is generally more practical than trying to seal it with tape. A temporary patch may reduce leakage but usually will not restore full suction or durability.
Worn seals and gaskets
Air leaks around the lid, hose inlet, drain, or collection drum can reduce suction. Check that the lid is seated evenly and that the gasket is not flattened, split, or displaced. Make sure the drain cap and hose connection are properly closed.
A replacement gasket or seal is usually a sensible repair when the tank and lid are otherwise sound. Do not use an improvised seal that interferes with the lid latch or creates a risk of the drum opening during use.
Faulty switch or cord
A switch that feels loose, sticks, or works intermittently may be replaceable, but electrical repairs require caution. Unplug the vacuum before inspection, and do not open the motor housing unless the manufacturer provides a service procedure and you are qualified to follow it.
A damaged power cord, plug, or strain relief should not be ignored. Have it repaired by a qualified professional or replace the vacuum if an approved replacement is unavailable. Do not continue using a cord with exposed conductors, scorch marks, melted insulation, or a loose plug.
Replacement suction hose
 9196300 Replacement Hose for Sh-op Vac, 1.25" x 4 Ft Flexible Wet/Dry Vacuum Hose, Durable…VoltRidge
$13.99 as of
View on Amazon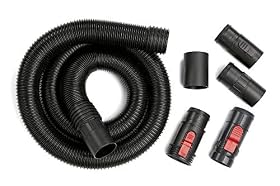 CRAFTSMAN CMXZVBE38763 2-1/2 in. x 7 ft. POS-I-LOCK Wet Dry Vacuum HoseCRAFTSMAN
$29.99 as of
View on Amazon 6.5 Ft Wet Dry Vacuum Hose for WORKSHOP WS25020A Wet/Dry Shop Vacuums HosesKAKAPEOPLE
$27.99 as of
View on Amazon
Product prices and availability are accurate as of the date/time indicated and are subject to change. Any price and availability information displayed on Amazon.com at the time of purchase will apply to the purchase of this product.
Check these causes before blaming the motor
If the shop vac has weak suction or shuts down, use this order of checks:
1. Inspect the filter
Turn off and unplug the vacuum. Remove the filter according to the instructions and check for heavy dust, moisture, tears, or an incorrect installation. A wet filter in a dry-use setup can restrict airflow, while using the wrong filter can allow debris into areas it should not reach.
2. Check the hose and attachments
Test the hose and tool path for obstructions. A blocked nozzle can make the vacuum sound normal while collecting very little material. If possible, check suction at the inlet with the hose removed, but keep fingers, clothing, and loose objects away from the opening.
3. Look for air leaks
Inspect the lid gasket, hose cuff, inlet connection, drain plug, and drum seams. Confirm that the lid is latched and the collection container is seated correctly. Air leaks can be more noticeable when using a long hose or restrictive attachment.
4. Confirm the setup
Use the vacuum only for materials and conditions allowed by its instructions. A wet/dry vacuum may require a different filter or setup for liquid pickup than for dry debris. Do not use a collection bag, filter, or attachment that is not compatible with the vacuum.
For liquid pickup, check whether the float shutoff has activated. Stop the vacuum, unplug it, and empty the drum before investigating further. Never bypass a float shutoff or other protective device.
5. Empty the drum or replace the bag
A full drum or overfilled collection bag can reduce airflow and cause poor pickup. Empty the drum before debris reaches the intake area, and replace or clean the bag as directed. Check for compacted debris that may remain around the inlet even after the drum appears empty.
6. Consider motor or electrical failure last
If the filter, hose, seals, setup, and collection capacity are correct, then the motor, switch, thermal protection, or electrical circuit may be involved. A vacuum that hums without starting, trips the circuit, smells strongly of burning insulation, sparks, or becomes unusually hot should be unplugged and removed from service.
Do not keep resetting a breaker or repeatedly restarting an overheating vacuum. Motor and internal electrical repairs should follow the manufacturer's service instructions and may require a qualified technician.
Replacement hose connectors
 Shop-Vac 9042800 2.5 Inch Hose Coupling, Durable Connection (1-Pack)Shop-Vac
$7.66 as of
View on Amazon WORKSHOP Wet/Dry Vacs WS25055A 3-Piece Adapter Shop Vacuum Attachment KitWORKSHOP Wet/Dry Vacs
$8.73 as of
View on Amazon Shop Vac Vacuum (2 Pack) 2-1/2" Threaded Hose End # SVR-4515-2pkShop-Vac
$18.09 as of
View on Amazon
Product prices and availability are accurate as of the date/time indicated and are subject to change. Any price and availability information displayed on Amazon.com at the time of purchase will apply to the purchase of this product.
When replacement is usually the better choice
Replacement is generally reasonable in these situations:
- The motor has failed and the part plus labor is a large portion of a new unit's cost.
- The collection tank is cracked, warped, or no longer seals.
- The vacuum has multiple problems, such as a weak motor, damaged hose, and failing switch.
- The cord, plug, or internal wiring has serious damage.
- Replacement parts are discontinued, unavailable, or nearly as expensive as a new vacuum.
- The vacuum repeatedly overheats or trips a circuit after basic airflow problems are ruled out.
- The machine no longer fits the work: for example, it lacks the filtration, capacity, hose size, or wet-pickup capability you now need.
A broken accessory alone is not a good reason to replace the entire vacuum. Hoses, filters, cuffs, wands, floor nozzles, and some casters are often replaceable if the main unit remains structurally and electrically sound.
When repair is worth more than the part price
A repair may be worthwhile even when the vacuum is older if it has a durable tank, a useful hose or attachment system, adequate capacity, and a motor that runs smoothly. It can also make sense when the vacuum is built into a workshop setup and replacing it would require new adapters or accessories.
On the other hand, avoid spending money to preserve a vacuum that is unsafe, repeatedly unreliable, or poorly matched to the work. The lowest-cost repair is not always the lowest-cost ownership if the same failure keeps returning.
A simple repair-or-replace decision
Use this quick checklist:
- Filter, hose, gasket, bag, or attachment problem: repair or replace the individual part.
- Loose connection or incorrect setup: correct it before buying anything.
- Switch or cord problem: repair only with an approved part and appropriate electrical expertise.
- Motor, tank, or control failure: compare the complete repair cost with a replacement vacuum.
- Several major failures or a safety defect: replace the unit.
- No parts support or unclear compatibility: replacement is often the more practical option.
Before ordering a part, record the exact model information from the vacuum's label and confirm compatibility with the manufacturer's parts documentation. Similar-looking filters, hoses, and cuffs may not fit or seal correctly.
What to do with the old shop vac
If you replace the vacuum, do not put a unit with electrical or battery components in ordinary trash where local rules prohibit it. Check local recycling or waste-disposal guidance. Reusable accessories may be retained only if they are compatible with the replacement unit and are clean and undamaged.
FAQ
Is it worth replacing a shop vac motor?
Sometimes, but motor replacement is usually worth considering only when the vacuum is relatively new, the correct motor is available, and the total repair cost is clearly below a suitable replacement. A failed motor combined with other worn parts usually favors replacement.
How do I know if my shop vac filter is bad?
Look for tears, collapsed pleats, permanent clogging, moisture damage, or a filter that no longer seals correctly. Weak suction can also result from a dirty filter, but confirm that the hose, attachments, drum, and seals are not blocked or leaking first.
Can a cracked shop vac hose be repaired?
A small temporary patch may reduce an air leak, but a hose with a split, collapsed section, or damaged connector is usually better replaced. The replacement must match the vacuum's hose connection and intended use.
Why does my shop vac shut off after a few minutes?
Restricted airflow, a full drum or bag, a clogged filter, or an activated thermal protector can cause shutdown. Unplug the vacuum, allow it to cool, and check those causes first. If it overheats or shuts down again after airflow is restored, stop using it and seek service or replacement.