Unplug the shop vac immediately and do not turn it back on. Water inside the motor housing can create a shock, fire, or motor-damage hazard. Here is how to check the cause and decide whether the vacuum can be safely recovered.
Water getting into a shop vac motor is a serious problem: unplug the vacuum immediately, keep it disconnected, and do not test it by turning it back on. Water may have bypassed the float shutoff, entered through an opening, or been pulled into the motor after the drum overflowed. Let the unit dry only if the manufacturer permits it; otherwise, have it inspected by a qualified appliance or electrical repair professional.
What to do immediately
Switch the vacuum off and unplug it. If the plug, outlet, or cord is wet, turn off the circuit breaker before touching the plug.
Move the vacuum away from standing water only if you can do so safely without touching wet electrical parts.
Do not run the vacuum to “dry out” the motor. Energizing a wet motor can cause short circuits, arcing, electric shock, or permanent damage.
Empty the drum and remove the hose and attachments. Keep the motor head upright so additional water does not spread through the housing.
Check the manufacturer’s instructions. Wet/dry vac designs vary, and some motor assemblies are not user-serviceable.
If water came from a flooded area, sewage, chemicals, or other contaminated liquid, avoid opening the motor housing. Replacement is often safer than attempting to clean contaminated electrical parts.
Confirm whether water reached the motor
Water in the collection drum is normal during wet pickup. The concern is water inside the motor head, motor cavity, switch area, or electrical connections.
Possible signs include:
Water dripping from the motor housing or exhaust area
A wet or unusually heavy motor-head assembly
A burning smell, buzzing, crackling, smoke, or visible arcing
A tripped breaker or ground-fault circuit interrupter
The motor running unevenly, slowing down, or refusing to start after the incident
Water expelled from the exhaust when the vacuum was operating
Do not remove a sealed motor cover unless the manufacturer specifically provides that procedure. Internal capacitors and electrical connections may remain hazardous even after the vacuum is unplugged.
Product prices and availability are accurate as of the date/time indicated and are subject to change. Any price and availability information displayed on Amazon.com at the time of purchase will apply to the purchase of this product.
Check the common causes in order
1. Check the filter and wet-pickup setup
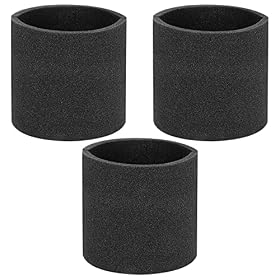
A filter installed incorrectly, a filter that is saturated, or a filter used for the wrong type of pickup can restrict airflow and contribute to moisture being pulled toward the motor. Some wet/dry vacuums require the standard dry filter to be removed for wet pickup, while others use a specific foam or wet filter. Follow the instructions for your exact model rather than assuming all shop vacs use the same setup.
Inspect the filter for:
Tears, loose edges, or a collapsed shape
A filter that is not seated against its gasket
Excessive water saturation
Dirt buildup that severely restricts airflow
A missing filter retainer or cage, if your model uses one
Replace a damaged or incorrect filter. Do not reinstall a wet filter for dry pickup unless it is designed to be used that way and has been dried according to the manufacturer’s instructions.
2. Inspect the hose, inlet, and float shutoff
A blockage can reduce airflow and may contribute to liquid being carried farther into the vacuum. Disconnect the hose and look through it. Check the tank inlet, wand, floor nozzle, and any narrow attachment for debris.
Most wet/dry vacuums have a float or automatic shutoff that should stop suction when the drum reaches its liquid capacity. With the motor head removed, check whether the float moves freely and whether dirt or debris prevents it from rising. Do not force the float or permanently disable it.
If the float is damaged, stuck, or missing, replace the appropriate part before using the vacuum for wet pickup.
3. Check the lid gasket and other seals
A damaged lid gasket can allow air and liquid to bypass the intended airflow path. Inspect the gasket around the motor head and the seal where the hose connects to the tank. Look for cuts, flattening, gaps, or areas pulled out of their groove.
Also check that the tank latches close evenly. A lid that is not seated correctly can cause poor separation and may allow water to reach the motor head. Replace worn seals rather than relying on tape or improvised packing materials.
4. Verify the setup and liquid level
Make sure the motor head was installed in the correct orientation and that all required float, filter, cage, and retainer parts were present. Never exceed the drum’s wet-pickup capacity. Stop the vacuum and empty it as soon as the float shutoff activates or the manufacturer’s instructions call for emptying.
If the vacuum was used on a slope, carried while full, or tipped during pickup, liquid may have bypassed the normal shutoff. Keep the unit upright during use and transport.
5. Check for an overfilled drum or failed shutoff
An overfilled tank is one of the most common paths for water to reach the motor area. If the float did not stop the vacuum, inspect it for obstruction or damage. Check whether the motor head was removed while liquid remained in the drum and whether water splashed into the underside of the head.
A vacuum that repeatedly fails to shut off during wet pickup should not be used until the float system has been repaired or the unit has been replaced.
Product prices and availability are accurate as of the date/time indicated and are subject to change. Any price and availability information displayed on Amazon.com at the time of purchase will apply to the purchase of this product.
Can a shop vac motor dry out and work again?
Possibly, but drying does not guarantee that the motor or electrical insulation is safe. If only the removable exterior parts became wet, you may be able to clean and dry them according to the manufacturer’s instructions. Keep the unplugged unit in a dry, well-ventilated location and do not apply heat that could damage plastic, seals, wiring, or insulation.
If water entered the motor housing, switch, wiring, or bearings, have the vacuum evaluated before reconnecting it. A qualified professional can determine whether internal parts need cleaning, insulation testing, lubrication, or replacement. Do not rely on the absence of visible moisture as proof that the vacuum is safe.
When to replace the vacuum or motor assembly
Replacement is usually the reasonable next step when:
Water remained inside the motor housing for an extended period
The vacuum collected contaminated or chemically aggressive liquid
Replacement motor parts are unavailable or cost close to a new compatible vacuum
The housing, cord, switch, or insulation is damaged
If the rest of the vacuum is in good condition and the manufacturer supports repairs, a compatible motor-head or motor assembly may be practical. Match the exact model and electrical specifications; a visually similar part is not necessarily safe or compatible.
How to prevent water from reaching the motor
Use the wet-pickup filter or filter configuration specified for the vacuum.
Keep the float shutoff clean and free-moving.
Empty the drum before it reaches its maximum liquid capacity.
Keep the vacuum upright while operating and moving it.
Inspect lid gaskets and hose connections for leaks.
Stop immediately if the float activates, the motor sound changes, or water appears at the exhaust.
Never use a damaged cord, plug, switch, or motor housing.
For future wet pickup, follow the exact instructions supplied with your model. If the vacuum has been exposed to substantial water inside its electrical components, do not use it until a qualified professional or the manufacturer confirms that it is safe.
Can I turn on a shop vac after water got into the motor?
No. Unplug it and do not energize it until the motor housing and electrical parts have been inspected and the manufacturer’s instructions permit operation. A wet motor can create shock, fire, or short-circuit hazards.
Why did water get past the float shutoff?
Common causes include an overfilled drum, a stuck or damaged float, incorrect filter setup, a tipped vacuum, a blocked hose, or a lid gasket that is not sealing correctly.
Should the filter be installed when using a shop vac for water?
It depends on the model. Some wet/dry vacuums require the dry filter to be removed for wet pickup, while others require a specific wet filter. Follow the instructions for the exact vacuum.
Is a shop vac ruined if water enters the motor?
Not necessarily, but it should not be assumed safe. If water reached the motor, switch, wiring, or bearings, the unit needs manufacturer-approved service or evaluation by a qualified professional. Replace it if it is damaged, contaminated, unreliable, or uneconomical to repair.